The process of adding a photo to a page on Our Brant is going to be upgraded soon to make it easier. In the meantime, if you don't feel comfortable submitting a photo yourself, you can bring it in to the Paris branch at 12 William Street or submit it by e-mail to the Reference Librarian using this form. We'll take care of adding it for you.
Adding a photo[]
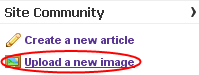
- On the left side of your screen, look for the text that says "Upload a new image." Click on it.
- Click the Browse button.

- Locate your file, and click on it. Then click the Open button.

- Enter your photo in the box that says Destination filename:, then type a short description of your photo in the box that says Summary:

- Click the box next to the word Licensing:
- If you took this photo, or you otherwise own the copyright to it, click on the option that says I took this photo
- If you took this photo, or you otherwise own the copyright to it, and you want to give other people the right to share and reuse it under the terms of a Creative Commons license, click on the option that says This is licensed under the Creative Commons Attribution-Share Alike License
- If you know that this photo is in the public domain, click on the option that says This is in the public domain
- Click the button that says "Upload file".
- Now you can use a form to edit a page, or create a new page. On that form, click on the button that says "Add another" in the part of the form that talks about photos.
- Now just type in the name you gave the photo, and a short caption to be shown underneath it.
- Scroll down to the bottom of the page and click "Save page".


You're done! Your photo will be shown on the right side of the page.

Back to tutorials...